
Bluegrass banjo for beginners:
Advice about posture:
Good posture is very important in attaining good technique.
Youtube video of Posture while playing the banjo
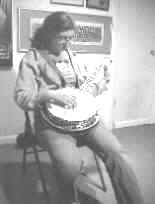 bad
posture...student slumps, banjo flat-out, hard to reach around the neck to
fret properly..
bad
posture...student slumps, banjo flat-out, hard to reach around the neck to
fret properly..
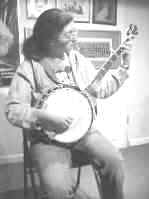 good posture: The back is straight, the banjo neck points out at about 45 degrees,
the plane of the banjo is perpendicular
to
floor, and it is resting between the thighs.
good posture: The back is straight, the banjo neck points out at about 45 degrees,
the plane of the banjo is perpendicular
to
floor, and it is resting between the thighs.
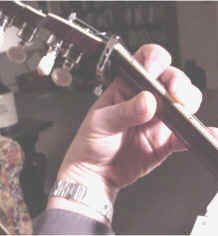
POSTURE for the right hand:
Note in the photo below, that the right hand wrist has a bit of a convex bend to it. This will make picking easier:
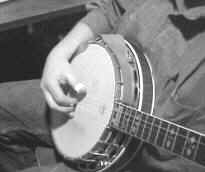
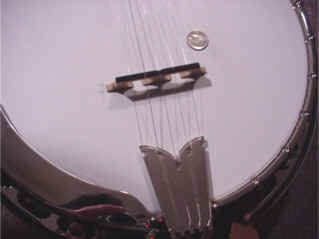
You must try to anchor your ring finger onto the head as you pick bluegrass style. Earl Scruggs, in his book, recommends anchoring both the ring and pinky. If you have trouble doing this, tape some velcro onto the tip of your ring finger and some onto the head of the banjo to keep that ring finger trained to stay on the head.(You can even use double-sided tape.) This trick usually works! Pick the strings about 1.5 to 2 inches from the bridge. After a few days you will not need the velcro and your ring finger will remain anchored to the head. If you anchor only your pinky, you will not have the same stability of your picking hand compared to anchoring both the ring and pinky.
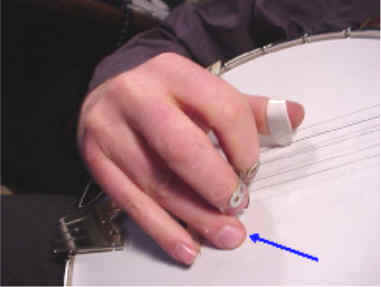
The location of the dime in the next photo is approximately where you should anchor your ring finger:
NOW, HAVING SAID ALL THAT ABOUT THE IMPORTANCE OF ANCHORING THE RING FINGER, SOME STUDENTS FIND IT PHYSICALLY IMPOSSIBLE TO DO SO. IN THAT CASE GO AHEAD AND ANCHOR YOUR RING FINGER. LOTS OF GREAT PLAYERS DO SO
=====================================
Left (fretting) hand posture: The correct angle of the wrist is a little concave(toward you). This will increase the reach of your ring finger and pinky. Make sure you press your finger down on the string just before the fret(right next to the fret).
Incorrect position(below): You can't reach the frets well if you grab the neck like a club:

Left hand positions relative to the fret:
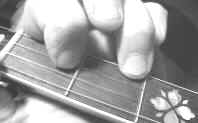
Notice that the left hand fingers are close to the fret, not right on the fret. Nor are they too far from the fret. They should be just before the fret as in the above photo.